Thursday 10 November 2016

Score display in Pseudocode


To easily work out your game, it is good to align your game code through Pseudocode. This is artificial and informal language for developing algorithm. 

Our game:
Drop the box
collect the box


Pseudocode
initialize boxcollected to zero
initialize totalboxes to zero

drop box
if collected 
  increase boxcollected by one
print boxcollected
end if
increase totalboxes by one
print totalboxes


The above forms bases of our code. This will be broken down into various functions in C#. It is self explanatory for a basic games. As we advance our story line, we will now be advancing our pseudo code. Every time you want to update your game, first update story line, then pseudo code before actual game coding. 

It is now time to turn our pseudocode into C# code and display our score

Pseudocode
initialize boxcollected to zero
initialize totalboxes to zero

drop box
if collected 
  increase boxcollected by one
print boxcollected
end if
increase totalboxes by one
print totalboxes

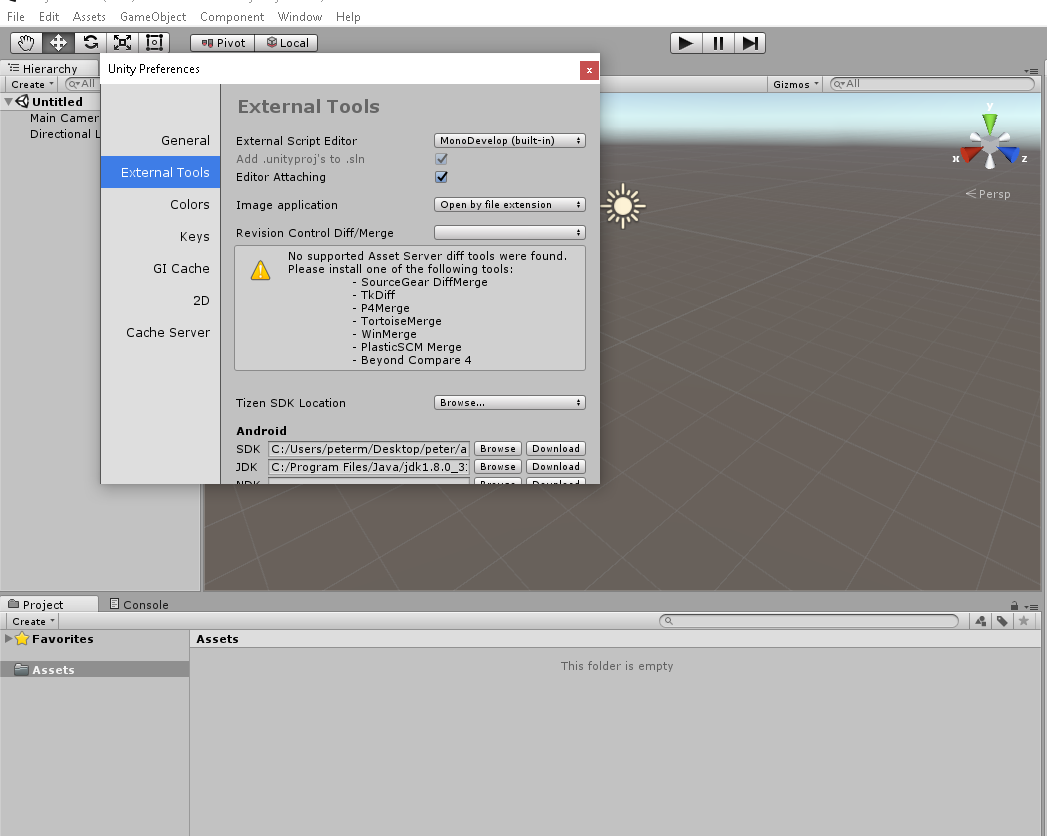
In unity editor, inside assets folder, create a folder (from project menu, create -> folder) and name it Scripts. inside this folder, add C# script from project menu, create ->C# Script and name it CatchBox. 


Double click our new script to open. It opens with the default code.

We begin by declaring variable to store boxes collected
int boxescollected =0;

Then declare variable to store total boxes:
 int totalboxes =0; 

Every time a box is added to game, we add totalboxes: This will be added inside update method

totalboxes +=1;
 
We will use colliders added to the boxes to determine when the boxes collide. This denotes the box was collected. Every time the two boxes collide, we add boxescollected. We add a new method to detect collision and add

boxescollected +=1; 

To know which box collided, we need to add tag to differentiate our boxes. Lets add tags "catch" and "box" and assign to our boxes.

Select box and in the inspector under tag, click add tags. In the tags, click + sign  and add "catch" in tag 0. click + again and add "box" in tag 1.


Select our box again and set tag to "box". Select catch and set tag to "catch". 


Save project. 

Select "catch up" in the heirachy and drag C# script from script folder and drop in the inspector panel.


 Save project

using UnityEngine;
using System.Collections;

public class CatchBox : MonoBehaviour {
    int boxescollected =0;
    int totalboxes =0;
    // Use this for initialization
    void Start () {

    }

    // Update is called once per frame
    void Update () {

    }
}

  
Lets add new method to check collision:

void OnCollisionEnter(Collision other)
    {
        if (other.gameObject.tag == "box") {
            boxescollected += 1;
            Destroy (other.gameObject);
        }

    }


Since the code is attached to "catch up", it detects collision between it and other game objects. We check if the object has tag "box" and add
boxescollected. We then destroy the box.

We need to display our boxes. We use OnGUI method 

void OnGUI()
    {
        GUI.Label (new Rect (10,10, 300, 50), "Boxes collected: " + boxescollected);
    } 


Save the code. 

Below is the complete code for our game: 

using UnityEngine;
using System.Collections;

public class CatchBox : MonoBehaviour {
    int boxescollected =0;
    int totalboxes =0;
    // Use this for initialization
    void Start () {

    }

    // Update is called once per frame
    void Update () {

    }
    void OnCollisionEnter(Collision other)
    {
        if (other.gameObject.tag == "box") {
            boxescollected += 1;
            Destroy (other.gameObject);
        }

    }
    void OnGUI()
    {
        GUI.Label (new Rect (10,10, 300, 50), "Boxes collected: " + boxescollected);
    }


Run the game


This is the most basic games.

We learn the basics of working with unity. The game developed so far is a skeleton game. Only one box dropped and collected.

What we know:
Story line:
The game involves some boxes that drop from above and the player is required to collect the boxes. At the end of the game. the player should be able to tell how many boxes we generate and how many s/he managed to collect.

What we have done so far:
Dropped a box and collect it and, display the number of box collected . To further our game, we need to drop more boxes and collect them. This will enable us display the total boxes generated.  We need to advance our story line:

Updated Story line:
The game involves some boxes that drop from above and the player is required to collect the boxes.The boxes drop from any point above the catch up box. We move the catch up box to collect the boxes on left or right. No box should fall down. At the end of the game. the player should be able to tell how many boxes we generate and how many s/he managed to collect.

The new story line provides:
  1. We generate the boxes randomly.
  2. Move catch up box right or left. This now defines the player. 
  3. Display the boxes lost.
  4. Display total boxes dropped
To break the game, we advance our code to move the catch up box, then generate more boxes before displaying our score. We then need to redefine our pseudo code to reflect the new changes

To make the game more interactive, we introduce the player element. We need to move the player to collect the boxes.
We first check if the total boxes collected are less than boxes to collect. If condition holds we drop a box and collect.

initialize boxcollected to zero
initialize totalboxes to zero
initialize boxtocollect to 40

While totalboxes < boxtocollect
drop box
Move playerbox
if collected
  increase boxcollected by one
print boxcollected
end if
increase totalboxes by one
print totalboxes
end while


Our pseudo-code is taking shape now.

Just a reminder:
  1. You need to know your goal. Always remind yourself what your goal is a game developer. Whether it is to make money, entertain, train or for fun then don't deviate from that goal.  Most of us give up as result of undefined goal.
  2. Review your skills. Get to understand what you need to develop your game. The skill needed to develop a game can be acquired from a training college, online, self taught or trial and error. Always expand your skills through self training and appreciate any little progress you make.
  3. Review your tools of work. Keep yourself up-to-date with new developments in regard to the technology you adapt to develop your game. Unity keeps on changing every day. You need to acquire new skills as they are released.
  4. Do not limit yourself to one field. Always explore to learn more.
  5. It is never too late to start. Even with saturated market, your game stands a chance. Proper marketing coupled with constant updates makes your game visible to the world.
So how do you make your game stand among other developers:
  1. Marketing. You can develop a marketing plan. Either free or paid.
  2. Social media. Create online accounts on various social media and keep constant updates to keep you audience engaged.
  3.  In-game marketing. When developing game, give link to your games or marketing images for your games.
  4. Create support channels for your games. e.g create a YouTube channel for cartoon, music etc and use it to market your games.
  5. Website. Create website for your game.  Update it frequently.
Since our assumption is we don't have enough funds to do marketing, then use the available free resources like WordPress or blogger to create your website. create a free YouTube channel, google plus, twitter and Facebook accounts. You can also add other social media channels

Tuesday 8 November 2016

BASIC UNITY GAME


We will develop a very basic game. The aim is to give basic knowledge needed to create a functional game.

To start a game, you need to have a story line that will guide you game. Any update to game follows update to the story.

Our basic games is: Catch A box. 
The title of the game is simple and self explanatory.

Story line:
The game involves some boxes that drop from above and the player is required to collect the boxes. At the end of the game. the player should be able to tell how many boxes we generate and how many s/he managed to collect.

From story line above:
The required assets are just the box and few images. We don't need to download any assets for this game. Advanced well, the game can create one of the successful games. This is to mean that you don't need fancy assets to create a game.
We also need to show our results. The player should also be able to control the box.

The story line above will be update as the game evolves till a complete game is ready for the play store.
  1. You need to plan for you marketing. Don't wait till you game is live in store to start marketing. Making it in android play store requires extensive marketing.
  2. Create social media accounts for your game. Have enough followers to download your game.
  3. Have alternative ways of getting your game know to the world. This requires creativity.
  4. Regularly update your game. 
  5. Play your own game to know the weaknesses.
  6. Focus on strong points when marketing.
  7. Critics will be there whether the game is good or not. What matters is never quit.
  8. Never use copyrighted music or music you are not sure about ownership. Google has systems to check and confirm the music assest online. You account can get disabled.  Youtube has free to use music.
  9. If your app is disapproved due to copyright, it is not easy to reinstate it.
Our simple Game.
The game in this tutorial is basic game to demonstrate how to develop games in unity. The game is a 2D.
Please follow steps described in the tutorial: Basics you need to know here. Name the project as "Catch A box." 
Make sure you are under scene view. We now add a box. It is a 3D object added to 2D view.

We can add it in two ways
  1. From GameObject menu -> 3D object -> cube.
  2. From hierarchy, create -> 3D object -> cube.
Make sure you can see the rectangular box in both scene view and game view. The position does not matter at this time. We will work to position it to the right place as we build our game.

In the inspector, the setting for our box are now visible. Transform settings helps in positioning, scaling and rotating the box. collides will be used to test if the box comes into contact with any other game object.

Select the box if not selected in the hierarchy menu and in the inspector menu, change the name from cube to box as show below. Change its y position to 4.

We also need to add floor where all boxes will fall to. Add another box, call it catch up and adjust y position to -4.5 and scale it to 3 along x.

click on game view to see how the two boxes look like. We have now our bases for the game. The box at the top represent the box falling down while the one at the bottom represent the box capturing the falling boxes.

The box at the top will use gravity to fall.

In the next lesson, we learn gravity and collision. We will let the box fall and capture it with the box at the bottom.

To add movement to our box. We will add gravity to allow free fall of our box. The box will continue to fall till it comes across an obstacle. In our case, we need to capture the box

Select the box. Move to the inspector panel and add component. Select Rigidbody and not Rigidbody2D since it is a 3D game object.

Don't change the settings. Ensure Use gravity is ticked. Also ensure Box collider is present. Don,t tick "is trigger". This would cause our box to pass the catch up box.

Select catch up and make sure box collider is added and "is trigger" is disabled. Don't add Rigidbody as we don't want this box to fall.


Click the play button and watch the box fall down.


We need to redefine our game and make it more interesting hence need to update our story line. Every game is developed along a story line. This makes it easier for you to update the game without changing the original game plan.

Story line:
The game involves some boxes that drop from above and the player is required to collect the boxes. At the end of the game. the player should be able to tell how many boxes we generate and how many s/he managed to collect.

From the story line, we have managed to add box, move and pick it. The story line describes boxes with player collecting them. The player needs to know how many we released and how many were collected.

Task ahead:
  1. Generating more boxes.
  2. Player collect them.
  3. Display boxes generated
  4. Display boxes collected.
Generating more boxes: - We need to generate additional boxes. Our story line does not specify how to generate. This creates a scenario which defines game levels.
Level 1 ->  Generate one box at a time
Level 2 ->  Generate 2 or more boxes at a time and different intervals.
Level 3 ->  Generate and move the boxes to different directions.
and so on.

Player collect them: how does the player collect this boxes. Again this can define more levels. The player can move right to left. There can be obstacles he must jump to collect the box.

Working with current story line, we are left with displaying boxes collected and generated. this involves coding. As noted earlier, knowledge in C# (object oriented) is necessary at this point. We will walk together and explain the code in details.

We will then redefine the story line to describe how he should collect the boxes. This will now define our levels. The game can also be endless where we don't define levels but let the player continue with game changing the play settings each time certain score is reached.

Monday 7 November 2016

Simple way to develop a basic game and publish to google play


Don’t have budget to develop games? No need to worry. There are free software’s to learn and use to develop your game and publish to play store
1.       Unity free edition – The free edition has features to develop and publish to play store. Get a copy from unity official website. Assets are available from assets store for free. Tutorial are available on most websites for free. Unity comes with manual for reference. When downloading, ensure android module is selected and installed.
2.       Android SDK – it is required to develop and test android games. It is free download on android website. Pick the latest version. It also comes with emulator for testing the game.
3.       Photo editor software – MS Windows comes with free MS paint photo editor. If you have MS Office, it comes with photo editor. You can also download free photo editors online.
4.       Snipping tool – for capturing screenshots for store upload.

With the above combination you can now start your development process.

a)      Develop games on unity. It can be 2D or 3D. Depending on your choice, you can use C# or JavaScript. It is good to use the language you are comfortable with. The assets are drag and drop. Adding component to assets follows same principle or you can add directly from component section.
b)      Add images you create using your photo editor. Screen shot can be capture using snipping tool.
c)       Generate the APK file for testing – from unity menu, you can generate APK for testing and also upload to store. For the store, you need to sign your file from build menu. No software is required to generate certificate for the same. Unity has all resources for the same.
d)      After signing, test your APK using emulator. Install the file on emulator and confirm the game is functioning as required.
e)      If all is okay, it is time to upload to store.

UNITY BASIS

1.       Know how to locate and open unity in your computer. Unity installs in program files. It also creates shortcut on desktop for launching. Should you update unity, be sure to check the shortcut is for which version. Double click the unity icon to open.
    

2.       Unity opens the list of previous projects done. If you are working on new project, select new. 

3.       Give the project name and select your preferred location. Keep the location path as short as you can and be sure to note the folder location.

4.       Select 3D or 2D depending on the project you are working on. 3D is world space project using x-y-z coordinates.. 2D is x-y.
5.       Click create project. This will take some time and the window might disappear from view.
Unity will now open a blank project with camera and light.

 Test your project by clicking play button. A blue screen is displayed.

Click on play button again and it returns you to earlier screen. Also be sure to check the games tab, it opens blue screen but note the play button is not highlighted.

 This way you know the mode you are in.

Unity editor is split into 
  1. The view screen - Game and Scene view are the default. Other views can be added as and when needed. Scene view is the work space where you add game objects. It could be through drag and drop or adding the directly through various menus.
  2. The hierarchy - this displays all game objects added to the scene view or during game play. From here one can select on object and tweak the setting or add components to it. Objects can also be added from the create menu.
  3. Project panel - this displays all assets used in the project. One can add assets and also group similar assets in a folder.
  4. The inspector - this displays properties of any selected project component/asset/object.
  5. The main menu - like any other editor, unity has a main menu with list of menu items. 
For a basic start, it is important to understand and be able to locate the above. This are the main part one interacts with in a basic project. For advance projects, one is free to add more items to the editor as per the project and user requirement. For now, the tutorial is meant for a beginner with no knowledge in unity.

In unity, object are added either by
  1. Drag and drop from assets folder in project.
  2. Add from the hierarchy menu.
  3. From game object menu.
The project folder is where all project assets are stored. You can group them in folder for ease of access

Scripting can be done in C# or Javascript. This may require some knowledge on any of the 2 languages. Basic knowledge is need for one to successfully build any game. Scripts are added either from project menu or from assets menu. The naming is done at this point once the script is added to projects assets folder.

New assets can be imported into the project under assets menu. Packages can also be added depending on the functionality needed. Be sure to added assets and packages you need only.

I use C# as I find it much easier to learn and use if you have C++ or Java knowledge..

The blog continues next with Settings needed for a basic android game. All this time we have not used any coins to purchase software or pay subscription. The aim of the tutorial is to show you how you can use 25$ to create android game, publish to play store and make few coins out of it.

By this time you need to have android SDK with you. Download and mark the folder.

It is advisable to set all setting early in development. This make it easier for you to package the APK file in the end.

Adding android SDK: Go to Edit menu -> preferences. In the new screen, give SDK and JDK (Java Development Kit) paths under External tools. Close the screen.


Confirm under Edit menu -> modules that android is installed and loaded.


Go to File menu -> build settings and select android under platform and click switch platform. The project is now set for android development.

The default scene load is not saved by default. Go  to File menu -> save scene as. Create a folder inside assets folder and call it Scenes. Give the name of the scene and save.

Go back to File menu -> build settings and click add open scene. This adds current scene to build. When playing game after build, the first scene (0) is loaded first and depending on your coding all other scenes can be loaded.
Still in File menu -> build settings, click player settings. Navigate to other settings and scroll down to identification. in the bundle identifier add com.Company.ProductName where company is your company name and productname is the name of your game.


At this point, you don't need to specify the publishing settings. This can be done when you are ready to publish your game to Playstore.

Save scene and save project.